Yes, you can pressure wash pavers — but only if you do it the right way. In St. Louis, where clay soil, freeze–thaw cycles, and summer humidity all take a toll on hardscaping, cleaning pavers isn’t just about curb appeal — it’s about protecting your investment. This guide breaks down how to safely pressure wash brick, concrete, and stone pavers without damaging the surface or loosening the joint sand. We’ll cover what PSI is safe, when to clean for best results, and why resealing afterward matters more than most people think.
Whether you’re freshening up a patio in Kirkwood or blasting away algae on a shady driveway in Florissant, we’ll walk you through the process step by step. No sales pitch just real advice from contractors who’ve seen what happens when pressure washing goes wrong.
Is Pressure Washing Pavers Safe in Missouri?
Yes — if you use the right pressure, tools, and technique, it’s safe for most pavers.
But here’s the thing: St. Louis weather makes a big difference. Freeze–thaw cycles, humid summers, and clay-heavy soils all impact how pavers age and how they should be cleaned. Pressure washing can lift grime, algae, and efflorescence (that white chalky buildup) off your pavers. But crank the PSI too high or use the wrong nozzle, and you risk chipping the surface, blowing out joint sand, or even loosening the pavers themselves. The damage might not show right away but when winter hits and moisture seeps in, things can shift fast.
What that means for your patio, driveway, or walkway is this
Don’t treat pressure washing like a one-size-fits-all job. It’s a surgical tool, not a fire hose. Here’s a simple breakdown to keep you on the safe side:
Safe vs Unsafe Pressure Washing for St. Louis Pavers
| Condition | Safe | Unsafe |
|---|---|---|
| PSI | 1000–1500 PSI (low to medium pressure) | 2500+ PSI (especially on soft or old pavers) |
| Nozzle | 25–40° wide-angle tip | Turbo or 0° pinpoint tips |
| Distance From Surface | 8–12 inches | Under 4 inches (risk of surface etching) |
| Surface Type | Concrete, sealed stone, brick with stable joints | Cracked pavers, loose sand joints, porous natural stone |
| Timing (Best Season) | Spring or early fall (moderate temps, dry forecast) | Mid-winter (freeze risk) or summer heat (rapid drying) |
| Prep & Finish | Sweep debris, test spot, re-sand and seal afterward | Skipping prep, no sealer = faster wear & weed growth |
When done right, pressure washing helps extend the life of your pavers. When done wrong, it can shorten it.
What PSI Is Safe for Pavers in St. Louis?
Let’s break it down plain and simple the right pressure matters. Use too much PSI and you’ll chew up the surface. Use too little and you’re just moving dirt around.
The sweet spot for most pavers in St. Louis is between 1000 and 1500 PSI. That’s enough to remove grime, algae, and mildew without damaging the surface or dislodging joint sand.
Why this range? It comes down to a few local realities:
-
Our clay soils shift easily, so keeping pavers stable is key.
-
Winter freeze–thaw cycles can exploit even small cracks or gaps created by aggressive washing.
-
High summer temps can cause pavers to dry out and become brittle, especially if they’re older or unsealed.
Here’s how to choose the right PSI based on surface type:
| Paver Material | Recommended PSI Range | Notes |
|---|---|---|
| Concrete Pavers | 1200–1500 PSI | Durable but can etch under concentrated spray or at close range. |
| Brick Pavers | 1000–1200 PSI | Softer; prone to surface flaking and mortar joint damage. |
| Natural Stone | 800–1100 PSI | Varies by type — err on the side of caution for softer stone like limestone. |
| Stamped or Sealed | 1000 PSI max | High pressure can strip sealer or alter texture. |
Pro Tip: Always test in a small, hidden area before committing. If the surface lightens or the sand starts pulling out, ease off immediately.
What St. Louis Homeowners Should Know Before Cleaning Pavers
When it comes to pressure washing pavers, knowing what you’re working with and what your property is up against is half the battle. Before you fire up the washer, take a few minutes to assess the surface, the season, and the way your yard handles water. Each of these factors plays a big role in whether your pavers come out cleaner… or cracked.

What Kind of Pavers Do You Have?
Not all pavers are created equal. The type of material you’re cleaning will tell you how much pressure is too much, what kind of nozzle you should use, and whether you need to reseal afterward.
-
Concrete pavers are common in patios and driveways across St. Louis. They can handle moderate pressure, but you’ll still want to stick to the lower end of the PSI scale 9especially if they’ve been sealed or are starting to wear down. Textured or tumbled surfaces also trap grime more easily, so cleaning them takes more care than force.
-
Natural stone pavers like travertine or bluestone are softer and more porous. Here’s the thing: these look fantastic but can pit or flake if you go in with too much pressure. If you’ve ever asked, “Can I pressure wash travertine?”—the answer is yes, but gently, and only with a fan tip at a safe distance.
-
Clay or brick pavers are sturdy, but the real risk is in the mortar or sand joints. Too much pressure blasts those joints wide open, leading to loose bricks and fast deterioration. That’s why the team at RWPS always pre-inspects joints before cleaning anything vintage or mortar-set.
Knowing your material sets the tone for the entire cleaning process. Guess wrong, and you’re not just washing dirt you’re washing away the lifespan of your patio.
How Missouri Weather Impacts Cleaning Methods
St. Louis weather has a habit of messing with outdoor surfaces especially pavers.
Freeze–thaw cycles are the biggest culprit. If you pressure wash in the fall and water seeps into small cracks or pores, then the first hard freeze hits, that moisture expands. What started as a hairline crack can turn into a chipped edge or surface pop by spring.
Spring rains are another risk. Pressure washing just before a heavy downpour can wash out the joint sand, leaving pavers unstable or uneven. If you’ve ever walked out to your patio and noticed shifting stones after a storm, that’s likely the reason.
So what’s the move? Time it right. RWPS recommends scheduling cleanings in late spring or early summer after the last frost, but before humidity builds. Avoid power washing right before a cold front or a forecasted storm. It’s a small adjustment that saves major repairs later.
Does Your Patio or Driveway Have Drainage Issues?
Before you start spraying, ask yourself one thing: Where’s all that water going? In neighborhoods across St. Louis especially older ones like Webster Groves or Maplewood clay-heavy soils mean water drains slower than you think. If your patio or driveway has any low points, that runoff can pool up near foundations or seep between pavers. And if you’ve got a slight slope toward your home? That’s not just a wet spot it’s a foundation problem waiting to happen.
Here’s what RWPS does on every job: before pressure washing, they inspect slope direction, look for pooling spots, and plan the water path. If there’s no natural grade to help, they’ll recommend using a leaf blower or large squeegee to redirect runoff as you go.
This isn’t overkill it’s smart paver maintenance. Because cleaning your pavers shouldn’t mean flooding your basement or washing soil out from under your hardscape.
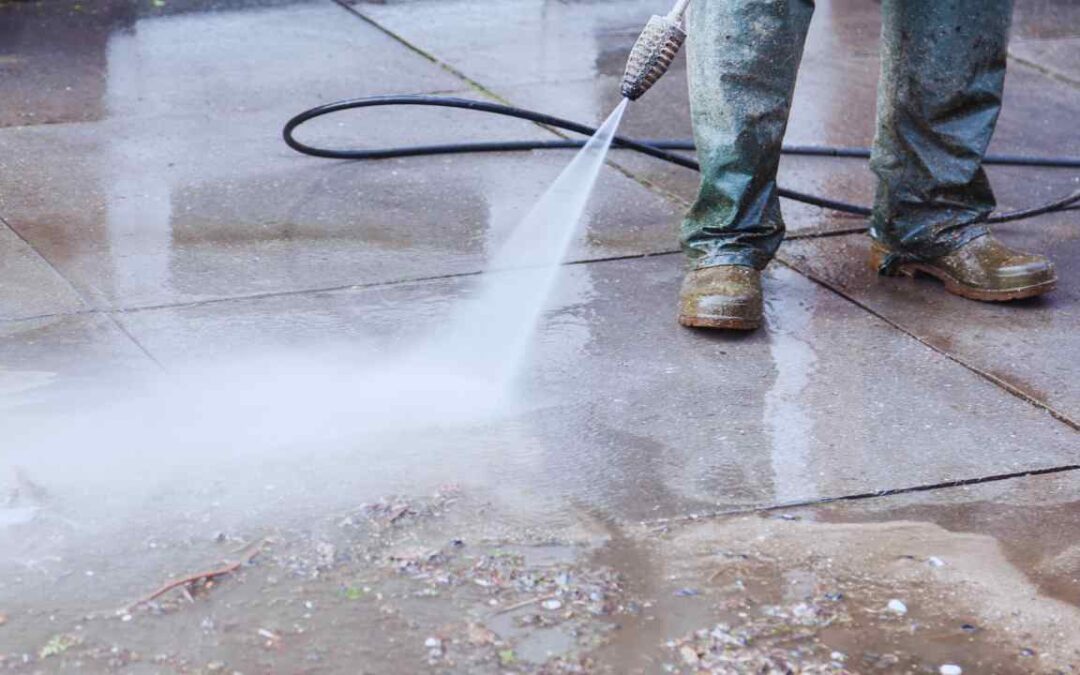
How to Pressure Wash Pavers Without Causing Damage
Pressure washing pavers can safely remove grime, mildew, and surface stains if you match the pressure and tools to the job. But if you overdo it with the wrong PSI or nozzle, you’re not just cleaning you’re etching, chipping, or blowing out the joint sand. This section breaks down exactly how to clean pavers the right way, especially with Missouri’s climate in mind.
Quick Facts on Pressure Washing Safety in Missouri Homes
Pressure level and technique make all the difference. According to the Interlocking Concrete Pavement Institute (ICPI), anything over 1500 PSI risks surface damage or joint sand displacement. That’s especially true for dry-cast pavers, which are common in suburban St. Louis builds.
Pinpoint nozzles (0° tips) are the #1 culprit for etching. Most damage happens when homeowners use narrow-angle tips thinking more force = better cleaning. In reality, it gouges the surface—especially on older, weather-worn patios.
St. Louis humidity creates mildew traps. Shady yards in areas like Webster Groves, Glendale, or Kirkwood often accumulate black algae or mildew around tree lines. These don’t require blasting—just a fan-tip nozzle and the right cleaner.
Home-use electric washers are usually safe. Most models sold at Missouri hardware stores operate between 1300–1700 PSI, which is within the safe range for pavers when paired with the right tip.
Annual pressure washing + resealing every 2–3 years = long-term durability. This combo protects your pavers from freeze-thaw cracks, especially in transitional seasons like early spring and late fall.
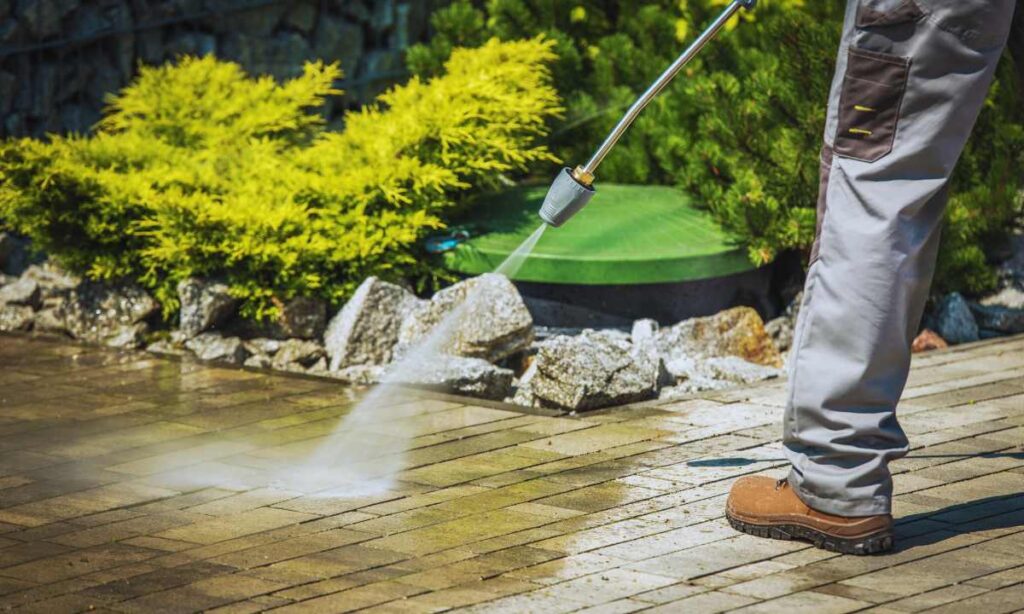
What PSI and Nozzle Should You Use?
1200 to 1500 PSI is the sweet spot for most residential paver jobs. It’s strong enough to lift dirt and algae without damaging the surface or dislodging the joint sand. Use a fan-tip nozzle between 25° and 40°. This spreads the pressure across a wider area so you’re not gouging the surface. Never use a pinpoint 0° tip that’s what causes etching, especially on brick and softer stones.
If you’re unsure about your pressure washer, check the manual or ask your local St. Louis equipment rental. Most home-use electric models fall within the safe range.
Should You Use Detergents or Just Water?
Yes, for tough stains or mildew, especially in shady spots where moisture lingers. Biodegradable, paver-safe detergents can help lift stains without harming plants or groundwater.
Avoid harsh chemicals like bleach, which can discolor pavers and kill surrounding grass or landscaping. Stick to products labeled safe for stone or concrete surfaces.
Example from the field: In areas like Webster Groves or Glendale, patios under mature trees often develop black mold or green mildew. A gentle cleaner paired with low pressure clears it up fast and avoids the need to crank up the PSI and risk damage.

Common Mistakes That Lead to Surface Damage
The biggest damage we see on Missouri pavers? It doesn’t come from the elements. It comes from well-meaning homeowners with a pressure washer.
Let’s break down the three most common mistakes the RWPS crew runs into and how to avoid them.
Getting too close with the nozzle.
This one’s easy to do and hard to undo. Holding the wand inches off the surface blasts the finish right off your pavers. You might not see it immediately, but that smooth, sealed surface? Gone. Now the pores are open, soaking up grime and water. Stick to 12–18 inches and keep it moving steady hand, even pass.
Shooting straight into the joints.
We get it. You see weeds or moss creeping in and want to blast them out. But pressure washing those joints directly is like pulling the pins out of a brick wall. It weakens the structure, flushes out the polymeric sand, and sets you up for shifting, settling, and erosion after the next hard rain. Instead, angle your spray and clean around joints not through them.
Overlapping high-pressure passes.
This one’s more subtle. You think you’re doing a deep clean, but doubling over the same path with high pressure can cause uneven wear — especially on older or sun-faded pavers. You’ll start to see zebra-striping, or worse, surface pitting.
Here’s the bottom line:
Damage from pressure washing usually isn’t instant. It creeps in over months — more water retention, faster fading, frost damage. That’s why the RWPS team always says: treat your pavers like they’re part of the structure, not just the surface. Clean smart, not hard.
Seasonal Advice for Pressure Washing in St. Louis

What’s the Best Time of Year to Clean Pavers?
Spring’s your sweet spot.
After a wet Missouri winter, pavers are usually covered in grime, mildew, or salt residue from de-icing. That’s when a smart, controlled pressure wash can reset your hardscape without doing harm. The team at RWPS often tackles cleaning and resealing jobs around late March to early May once the overnight freeze risk drops and before the summer heat kicks in.
Fall works too, but with a caveat. You’ve got a short window between when the leaves stop dropping and before the first hard freeze hits. Cleaning too late in the season is risky water can settle into joints or micro-cracks and expand once temps dip below freezing. That’s a recipe for flaking, joint failure, and spalling. If you’re thinking about a fall clean, aim for early October at the latest.
Can You Pressure Wash Pavers in Winter or Summer?
Winter? Skip it.
RWPS doesn’t pressure wash pavers during winter for one simple reason water expands when it freezes. Even a light wash can drive moisture deep into the surface or sand joints. If a cold snap hits that night, you could wake up to cracked edges or frost-heaved bricks. It’s just not worth it.
Summer? Yes, with caution.
Hot days in St. Louis especially July and August dry surfaces fast. That might sound like a good thing, but it can actually lead to streaking if detergent or dirt gets baked in before you rinse it off. We’ve also seen cases where rapid drying leaves behind pressure-washer swirl marks or faded patches. Early morning or late afternoon is the safer bet. Stick to cooler times of day and shade if possible.
What this means for your patio is simple:
Don’t just clean when it’s convenient. Knowing the seasonal rhythm of Missouri weather means your pavers will look better, last longer, and need fewer repairs. The RWPS crew plans pressure washing schedules around these seasonal swings for a reason because in this climate, timing isn’t optional. It’s essential.
What to Do After Pressure Washing Your Pavers
Should You Reseal Pavers After Cleaning?
Yes — especially after a deep clean or if it’s been over two years since the last seal. A proper reseal does more than make your patio or walkway look fresh. It locks in the color, keeps water out of the joints, and helps prevent weeds and algae from creeping back in. For St. Louis properties, where heavy spring rains and humid summers are the norm, sealing isn’t optional it’s protection.
RWPS recommends using a breathable, penetrating sealer not a thick film-forming type that can trap moisture and flake during freeze-thaw cycles. You want something rated for Midwest conditions. If you’re in areas like Kirkwood or Chesterfield where soil stays damp longer, this extra barrier makes a big difference in long-term performance.
Bottom line:
If your pavers have lost their sheen or look patchy after cleaning, that’s your sign to reseal.
What to Watch for in the Weeks After Cleaning
Just because the job’s done doesn’t mean you’re in the clear yet. Here’s what to keep an eye on:
-
Joint settling or shifting.
Pressure washing can sometimes dislodge sand, especially if joints weren’t compacted properly to begin with. If you see unevenness or gaps forming, you may need to re-sand and tamp those spots. -
Algae or mildew regrowth especially in shady spots.
North-facing patios or areas under trees tend to stay damp. Even after cleaning, they can turn green again fast if drainage is poor. If that happens, don’t just blast it again that’s when a spot treatment with a paver-safe mold inhibitor is smarter. -
White haze or streaking.
This usually shows up if the detergent wasn’t fully rinsed off. It’s not permanent, but it does mean you’ll need a second rinse or a light vinegar scrub to break it down. The team at RWPS sees this more often when DIYers clean on hot days and the soap dries too fast.
Pay attention in the first few weeks. That’s when problems show up. Spot issues early, and you’ll avoid bigger fixes later.
When DIY Cleaning Isn’t Enough for Your St. Louis Pavers
Let’s be honest pressure washing looks easy until it isn’t. If you’re staring at a large patio, years of mildew, or uneven pavers sunk into St. Louis clay, it might be time to call in a pro.
Here’s the thing: pros don’t just blast water. They know how to clean without loosening joint sand or forcing water underneath. They’ll use the right PSI, nozzle angle, and detergent mix based on your paver type and layout. That matters — especially in neighborhoods like Florissant or Kirkwood, where freeze–thaw cycles and expansive soils can turn small mistakes into costly repairs.
Hiring a local expert also means they’ve seen it all from white haze caused by leftover detergent to slow drainage that invites algae back within weeks. A good contractor won’t just clean. They’ll spot early signs of trouble, suggest smart drainage tweaks, and recommend sealing options that actually work for St. Louis weather. And don’t forget the time factor. What might take you an entire weekend (plus a sore back) is often done in a couple of hours professionally, cleanly, and without damage.
Need a hand from someone who knows pavers inside and out? RWPS’s paver installation and sealing team in St. Louis handles everything from cleaning and restoration to full rebuilds. It’s the kind of work you only trust to people who’ve done it for years and around here, that’s us.
Bottom line: If the area is large, the staining is stubborn, or the surface is uneven, let someone who works with pavers every week handle it. You’ll get better results, longer life, and peace of mind knowing your hardscape’s in good shape.
St. Louis Paver Cleaning: Answers to the Questions You’re Actually Asking
Can I DIY pressure wash my pavers or hire a pro?
It depends — not every job is a good fit for a DIY approach. If you’re working with a small, flat patio and you’re confident with a pressure washer, you can likely handle it yourself. But once you’re dealing with steep driveways, older pavers, or uneven settling, it’s worth calling in a pro. The RWPS team often sees DIY jobs that’ve gone sideways: joint sand blasted out, edges crumbling, or streaks etched into the surface. If it feels like too much, it probably is.
Why are my pavers turning white after cleaning?
That white haze usually means one of three things:
-
Efflorescence (natural salt coming up through the pavers)
-
Detergent residue that didn’t get rinsed properly
-
Hard water deposits if your rinse water is heavily mineralized
Efflorescence is common in humid, clay-heavy areas like St. Louis. If it’s residue, go back with a soft rinse and let the surface fully dry before applying any sealer. And remember: don’t seal over haze it’ll lock in the problem.
Will pressure washing remove the sand between my pavers?
Yes — especially if you’re not careful. Even with the right nozzle, the force of water can strip the joint sand out. That’s not always a bad thing, especially if you’re planning to re-sand anyway. But if you skip that step, you’re inviting weed growth, joint movement, and drainage issues. After every pressure wash, re-sand with polymeric or regular joint sand, then compact and sweep it in well before sealing.
Clean Smart, Protect Your Pavers Long-Term
Pressure washing isn’t complicated but getting it right takes a bit of know-how. Stick to low-to-mid PSI, fan-tip nozzles, and seasonal timing that works with St. Louis weather, not against it. That’s how you clean without causing damage. What that means for your patio or driveway is this: clean in spring or early fall, reseal when needed (usually every 2–3 years), and watch for signs of shifting or weed growth.
If you’re not sure what your pavers need or if they’re showing wear a quick inspection from a local pro can go a long way. Especially in areas with clay soil, freeze-thaw cycles, or heavy use. Bottom line? Treat your pavers right, and they’ll keep looking sharp for years. No damage. No guesswork.